In the realm of makeup artistry, achieving a flawless and radiant under-eye area has long been hailed as a coveted skill. As the windows to our souls, our eyes deserve special attention, and mastering the art of setting the under-eye area can work wonders in transforming our entire look. Enter the enchanting technique of baking – a makeup secret that has been passed down through generations of artists, revered for its ability to banish dark circles, reduce puffiness, and create an airbrushed finish like no other.
The Power of Baking in Makeup
Definition of Baking in the Context of Makeup Application
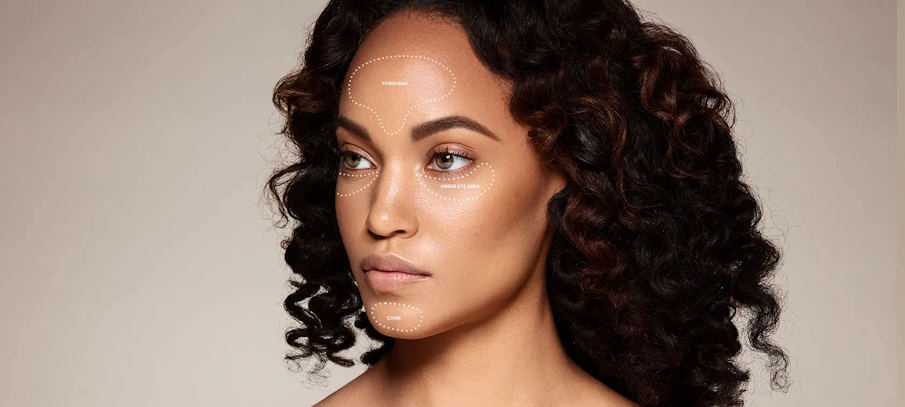
Baking, also known as cooking or powdering, is a makeup technique that has taken the beauty world by storm. It involves applying a generous amount of loose translucent powder to specific areas of the face, such as the under-eye area, T-zone, and chin, and allowing the heat from the skin to set the makeup. The powder sits on the skin for several minutes, allowing the natural warmth to lock in the products underneath. Once the “baking” period is over, the excess powder is brushed away, leaving behind a smooth, creaseless, and long-lasting finish. This technique is particularly popular for its transformative effect on the under-eye area, making it an essential step in the makeup routines of countless beauty enthusiasts and professionals.
Historical Origins of Baking in Makeup Artistry
While the term “baking” has gained popularity in recent years, its origins can be traced back to the drag queen community and theater makeup artists. These artists needed makeup that could withstand intense stage lighting, long hours of wear, and provide a flawless finish that could hold up under scrutiny. They developed the baking technique as a solution to combat creasing and ensure their makeup remained impeccable throughout their performances. Over time, baking transcended the drag scene and found its way into mainstream makeup routines, earning a reputation for its efficacy in achieving a flawless complexion.

Step-by-Step Guide to Baking the Under-Eye Area
Applying Concealer to Cover Dark Circles and Imperfections
The first step to achieving a flawless under-eye area is to start with a good concealer. Choose a creamy, hydrating formula that matches your skin tone or is one shade lighter to brighten the area. Gently dot the concealer under your eyes, focusing on the darkest areas and any imperfections you wish to cover. Use your ring finger or a damp makeup sponge to blend the concealer evenly for a seamless finish. Make sure not to tug or pull on the delicate skin around the eyes.
Selecting the Right Setting Powder for Your Skin Tone
The key to successful baking lies in selecting the right setting powder. Opt for a finely milled, translucent powder that matches your skin tone or is slightly lighter. Avoid powders with a heavy texture, as they may settle into fine lines and accentuate dryness. When in doubt, choose a neutral-toned powder to complement all skin types and colors. A yellow-toned powder can help counteract any redness or dark circles, while a peach-toned powder can brighten and correct dullness.
Techniques for Applying and Setting the Powder for a Flawless Finish
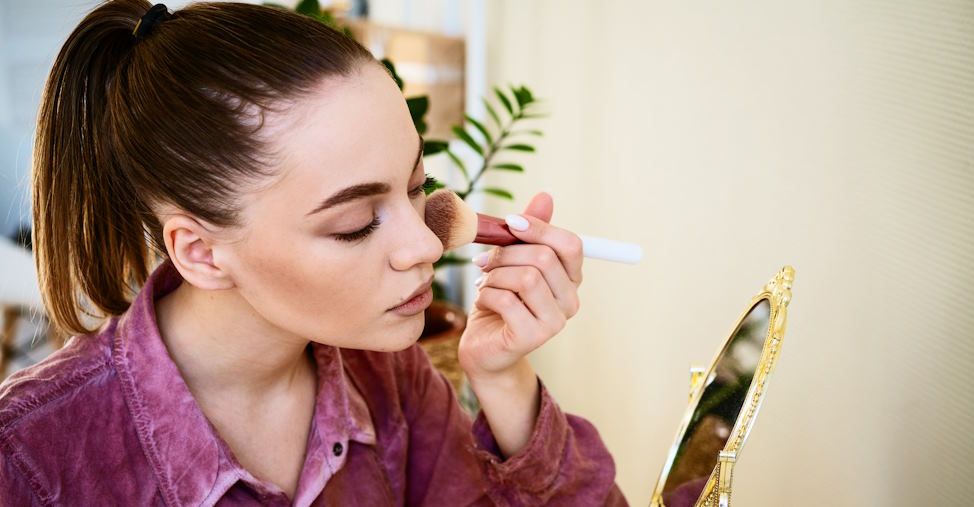
After applying concealer, take a damp makeup sponge or a densely packed powder brush and generously pat the setting powder over the concealed areas. Allow the powder to sit on the skin for about 5-10 minutes, during which time you can work on other areas of your makeup. The heat from your skin will set the concealer and allow the powder to absorb excess oils. Once the baking time is up, use a fluffy brush to gently dust away the excess powder. The result? A creaseless, smooth under-eye area that appears bright, lifted, and flawlessly set. Remember to be light-handed when removing the powder to avoid disturbing the concealer underneath.

The Aftermath: Removing the Baking
How to Properly Remove the Set Powder Without Disturbing the Makeup
As mesmerizing as the baking technique can be, eventually, it’s time to remove the set powder and unveil the final, flawless look. The key to removing baking without disrupting your makeup masterpiece lies in a delicate touch. Begin by taking a clean, fluffy brush and gently sweep away the excess powder from the under-eye area. Avoid using harsh or dragging motions, as this can disturb the concealer and cause creasing. Instead, opt for light, tapping motions to lift away the powder while keeping your makeup intact.
Gentle Skincare Routines for the Under-Eye Area After Makeup Removal
Once the baking is removed, it’s essential to give your under-eye area some extra love and care. Start by using a gentle makeup remover or micellar water to clean any remaining makeup residue. Avoid products containing alcohol or harsh ingredients, as these can dry out and irritate the sensitive skin around the eyes. Instead, opt for a nourishing, hydrating eye makeup remover that soothes and moisturizes the delicate skin.
After makeup removal, follow up with a gentle eye cream specifically formulated for the under-eye area. Look for ingredients like hyaluronic acid, vitamin C, and peptides, which can help hydrate, brighten, and combat signs of aging. Apply the eye cream using your ring finger, as it exerts the least amount of pressure, and gently pat the product around the eye area until fully absorbed.

